Wednesday, February 29, 2012

0

trik dalam permainan sepak bola

Trik-trik dalam permainan sepakbola

Sepak bola adalah permainan olahraga yang sangat populer diberbagai negara didunia, hampir dari segala umur menyukai permainan sepak bola ini.
Ada berbagai trik dalam bermain sepak bola yang membuat permainan menjadi lebih indah

Seperti pemain sepakbola di Brasil menunjukkan cara untuk mengalahkan lawan menggunakan trik yang pernah dilakukan oleh Zico pada masa lalu.Trik ini adalah cara klasik untuk mengalahkan bek-bek Brasil dengan “lebih gaya”. Trik yang dilakukan Zico adalah saat berhadapan dengan lawan langsung memutar tubuh 180 derajat tetapi bola tetap menempel di kaki.

Kita pasti sering terkagum-kagum melihat pemain-pemain sepakbola melakukan trik-trik sepakbola seperti jugling. Dan banyak dari kita tentunya tertarik untuk bisa melakukannya juga.
Di dalam dvd tutorial berikut ini, Anda akan diajarkan bagaimana melakukan beberapa trik sepakbola yang pastinya dapat membuat anda terlihat keren seperti roulette artinya berputar, tehnik mendribling bola dengan memutar badan sambil bergerak diatas bola, pedalada tehnik menggerakan kaki menari-nari diatas bola seperti mengayuh sepeda untuk menipu lawan,flip-flap,rabona,sombrero,dan trik-trik lainnya.
Permainan sepakbola tak hanya tentang lawan tetapi juga ketrampilan.

Keterangan
Judul : Football tricks
Harga : Rp 50.000.-

0

panduan photoshop

Panduan photoshop lengkap

DVD Tutorial Photoshop Top Secret adalah DVD yang berisi panduan (tutorial) untuk mempelajari PHOTOSHOP secara detail dan lengkap. DVD ini sangat cocok bagi siapa saja yang ingin mempelajari photoshop secara mandiri dari tingkat pemula hingga mahir.
Apa bedanya DVD ini dengan DVD tutorial photoshop yang lain?
di DVD ini anda tidak hanya akan mendapatkan tutorialnya saja tetapi juga akan diajarkan bagaimana cara untuk memanipulasi grafik dan membuat spesial efek dengan menggunakan Photoshop, karena inti dari Photoshop versi terbaru adalah fitur memanipulasi grafik dan spesial efek tersebut.
Meski tutorial dalam bahasa inggris tapi sangat mudah untuk diikuti karena tutorialnya dalam bentuk gambar bergerak (video) bahkan bila tanpa suarapun
anda masih dapat mengikutinya. 
Anda akan dikenalkan dengan desain kreatif. Desain poster-poster bioskop Holywood, ilusi wajah, Surreal mist, efek khusus, 
dan mengenal banyak teknik langka & mengagumkan. Melukis wajah, Teknik masking, Teknik Pembuatan cover DVD, Blend Tato ke badan, grafis web, Mengganti wajah dll


Daftar isi :

  1. Darking face
  2. Creating button
  3. Dream scene vol 1-4
  4. Dream skin vol 1-4
  5. Special effects vol 1-4
  6. Movie poster II vol 1-4
  7. Movie poster I vol 1-3
  8. Breaking apart vol 1-2
  9. Creating basic logo vol 1-2
  10. Creating text image vol 1-3
  11. Creating mists image vol 1-3
  12. How to swap people vol 1-4
  13. Making movie credit vol 1-2
  14. Creating elegant header vol 1-2
  15. Using vanishing points vol 1-3
  16. Applyng tattoo on skin vol 1-2
  17. How to mask fur on animals vol 1-3
  18. Putting image on to computer screen
  19. Making a face into stone portrait vol 1-6
Keterangan :
Judul    : Tutorial photoshop
Isi        : 4 dvd
Bahasa : Inggris
Harga   : Rp 95.000.-

0

Nail School - Day 37

I only have 1.5 days of school left. Can you believe it? I know I can't. This week I've been trying to pamper myself since I know I won't have much time to after I enter the work force.  Today another student treated me to a pedicure with a mud mask and a sea salt exfoliation.  My feet are so smooth that I can hardly walk without slipping! I've still been taking clients because I really enjoy it and I don't want to stop just because I'm almost done. Tomorrow I'm going to do my own nails and Friday I'm hoping to get a facial.

0

Swirls

Ever have a day where you need some nail art, but you have only a few minutes? This was one of those designs. I find that swirls can go on fast and are so free-form that they go with any look. To switch it up a bit, I had the swirls on my middle finger come from my lunula (in non-nail tech speak: half moon).

Tuesday, February 28, 2012

0

Nail School - Day 36

As I said a few days ago when I talked about the goals I've achieved/am still working on, I made some Obele nails! I'm really into shaping acrylics in interesting ways right now. I guess it's a little less boring than just forming "normal" nails. For a first attempt, I think these Obele's turned out awesome! Next time I hope to make my edges sharper. Usually the Obele nail has a much more dramatic stiletto, but I decided to try to make a more wearable Obele. According to this website (which has AWESOME explanations of nail shapes -- Obele is at the bottom of the page), the Obele is usually made from a UV gel. I assume it's usually a UV bonding gel, but at school we only have self-leveling UV gel, which as the name suggests, wouldn't be very good for building upwards. 


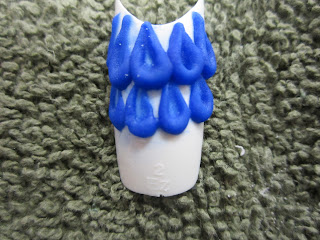
The Obele's were created last week, but today I worked more in 3D nail art. Here's a peek at what I was working on: 


0

Disco Nail Inspired

My new fake nails that I've been experimenting with yield tons of new opportunities. My little short squared nails would not have been at all conducive to this design. Anyways, I didn't really have a plan as I was painting this but it ended up having some Disco-Nail flair, I think. Disco-Nail is a Japanese based nail salon with a very distinctive style that tends to make really weird looking things end up beautiful. I'm a huge fan. Huge. Now if only I could pull off the more complicated designs... 

Monday, February 27, 2012

0

Gelish little princess and water decals

0

Water Marbling

Sadly, these are probably my best attempt at water marbling. I used all Sinful Color nail polishes, which made water marbling so much easier. I had heard a tip that using all the same brand polish really helped, and boy was that correct. I'm not sure if others have this same problem but my biggest issue with water marbling is BY FAR my placement. I am always like, "Oh, this is the spot I want my nail to look like... do do do.... Dang it, how did I get my nail on top of the ugly spot right next to the pretty spot?" What's the hardest part of water marbling for you?

Sunday, February 26, 2012

0

Nail Art Party

Friday evening my friend had the grand re-opening of her vintage store. Her store, Far Out Vintage, has been open for 3 years now and she just had an amazing location change (and, for people not in Rochester, she does ship items, so take a look at some of her stock on the link above). She was initially in a relatively slow paced plaza and she moved to a store front on a very busy street. To help celebrate her big move, I set up a free nail art station and did tons of nail art for customers and friends. I did eight people's nails, three of which were children under the age of 12. I loved working with the kids, but it did reinforce a belief I had. Everyone always says to me, "oh my gosh, you should do kids parties with those nail art skills." Well, I love the idea of doing an occasional kids party, but it's not the career I want to hold, and here's why: Kids have tiny little nails that aren't good for tons of detail, kids move around a lot which makes my lines pretty wavy, kids want cutesy things when I sometimes want to do creepy things. Anyways, I painted everything from panda bears, to mod flowers, to stripes, but most excitingly I had two firsts. Here's a photograph of my first first:


That's right, I did leopard print nails! This was a total first for me because I don't think I've ever done any animal print. I was worried that it wouldn't look random enough but I ended up loving the look. In fact I love it so much that I think I might wear around some leopard print nails for a while! 

My second first was that I did diamonds on another set of nails. Unfortunately I don't have any more photographs. This is because of two reasons: First, I was so busy that I hardly had time to snap a photo, and second because I didn't want to be intrusive to the little girls by taking their photograph. 

Hope you enjoy! I know I did!

Saturday, February 25, 2012

0

LV Nails

Louis Vuitton nails - hahaha :)


0

Nail School - Day 34

Yesterday (Friday), I didn't get home until very late because immediately after school I did nail art at my friend's store to celebrate her grand opening! I'll be posting about that later today.


Friday marked a very special day for me. It was exactly one week until I graduate nail school. At the end of my first week I blogged about accomplishments I hoped to achieve by the end of nail school. Here they are again with updates on my progress!

1. First and foremost, I want to get my nail technician license. This is really the only reason I'm taking the class to being with. I want to be able to practice nail art on others as a (sort of) career.

Obviously I don't have my license yet, but I'm on the right track to getting it! I am very confident that I will pass both of my exams after I complete school. After last night, I'm also confident that I will be able to practice nail art on others as a career. It might be a specialty thing, but it's fun and priced correctly, everyone wants it!

2. I want to be able to shape and file nails so that they are all the same length and shape. This has always been really hard for me. I depend too much on the nail bed and not enough on the length of the entire nail. I also really stink at filing. Once I tried to make my nails square and they were all sorts of crooked and crazy looking.

Okay, I was only semi-successful at this one. I am definitely way better at filing. But I feel that my biggest accomplishment with regards to filing is that now I can see what is wrong with the shape or length of the nail. However, that doesn't always mean I can fix it. 

3. I REALLY want to be able to create obele nails (see picture below). I think that I could do so much awesome nail art on these nails and I have an idea of how to make them more wearable too. I'm also interesting in learning the edge nail, which is a less dramatic version of the obele.

I'm gonna say accomplished on this one! You all saw my "The Edge" nail on Day 28. And I was so excited that on Friday I made my modified Obele nails! I, however, like a dolt, left them at school. I promise photos ASAP (probably Monday evening). We have these lockers at school and you get in trouble if you forget something at home so I always leave everything in the lockers, which is why I constantly can't show you all pics of the fun stuff I do! 

4. I want to have a job opportunity that allows me to do more nail art than the average nail tech. 

This one is almost definitely accomplished. But I don't want to count my chickens, so I'm going to wait to tell you all more about that for a few days =)

5. I want to get faster at nail art so that when I'm doing others nails it isn't too long of a procedure.

Oh yeah, I totally got this one. I can do a simple design in as little as 10 minutes now. And even more complicated designs don't typically take more more than an hour. But instead of worrying so much about this goal, I think I'll set a new goal: Don't be such a slave to the clock. 

6. I want to find out what types of designs other likes and be better at taking requests. I mostly do designs that are on my own nails so I really want to get used to doing nails that I'm not necessarily passionate about myself, but that my client will love.

I've been working really hard on this, but I don't think it's a goal that I will ever completely accomplish because it is something I need to build on for the rest of my life!

Friday, February 24, 2012

0

Hello All
Today i am sharing with you photos of my "Nail Treasures Chest" :)
To store my nail stuff i invested in "Alex" drawer from ikea.
It is a bit prices - a little over a 100, but well worth it, because it is a beautiful piece of furniture and does serve the purpose well .I have it since last summer and really love it.
The only thing i would change is make upper drawers taller, because as is zoya polish bottle wont fit, but i use it to store nail art and manicure stuff.


0

Lacey French Tip

This is some kind of lacey looking french tip. I like it a lot, but you might notice how insanely yellow my nails are underneath haha! Such is life for an addicted nail artist!

0

membuat ketrampilan dengan bahan yang mudah ditemukan

Kreasi dari bahan bekas/ daur ulang bukanlah hal yang baru, hanya saja kita tidak mengenal lebih jauh bagaimana cara mengolahnya.
Dari bahan- bahan yang sangat sederhana bahkan bisa dari limbah bekas yang sering kita temukan disekitar kita bisa dimanfaatkan dengan hasil maksimal yang tidak kalah menarik dengan kerajinan- kerajinan lain. Hasilnyapun bisa menjadi pembuka peluang baru dibidang bisnis.

Berikut dvd kumpulan kreasi dari bahan yang mudah didapat dan murah seperti kertas koran, botol,foam,pita,majalah bekas,kaleng,kain perca,sedotan dll
Dengan bahan diatas kita akan diajarkan antara lain cara membuat bunga, gelang, anting, vas bunga, lampu, dekorasi dan sebagainya.

Hasil ketrampilan dari bahan bekas ternyata tetap memiliki nilai jual tinggi, disamping itu bahan sangat murah dan mudah ditemukan
Siapkah Anda membuat kreasi cantik dan unik dengan bahan yang terus melimpah ?
Keterangan
Judul : Kumpulan kreasi inspiratif
Harga : Rp 50.000.-

Thursday, February 23, 2012

0

Nail School - Day 33

FINALLY! Pictures of the 3D nail art I did a few days ago. From left to right they go from first done to last done. My favorites are the yellow and white flower, the tree, the blue bubbles, and the ABC blocks. Which do you like? 
Now, on to my day today! Like I mentioned we had our 200 hour exam today. For it, we performed a full state board procedure on a model. I get super huge test anxiety which means I tend to freak out and then mess up. I didn't do *too* horribly, but I'll found out my actual grade soon. I know that I didn't do my best work, which means that no matter what grade I get, I will be disappointed. I know, I'm my harshest critic. The worst part of the exam was when I had to make a smile line using acrylic power/liquid. I made a smile hexagon instead/ Whoops. I later did my models nails with acrylics and formed all my own smile lines and each and every one of them came out perfect. So I'll chalk the error up to anxiety. On the plus side my teacher complimented my manicuring and polishing abilities quite nicely today. Which is odd to me because seeing all the swatchers polishing abilities, I've always thought I was bad at polishing. I'm finally starting to feel better, so there shouldn't be any more lapses in posts for a while!

These are on my nails currently. It's an acrylic nail that I made over a form (some call this "sculpting" the nail). The smile lines were all freehanded with the acrylic liquid/powder. I think I did a pretty good job! The green looks way more awesome in person! It's super glittery (but as we all know, glitter never looks as cool in pictures). 

0

Polka Dots Again

These are some polka dots. Some days, I'm really into dots.  These inspired my first ever 3D nail art, which was 3D random polka dots. 

0

Nail School - Day 32

Man, this cold I've had sure has decreased the number of blog posts I've been doing, huh? This post is for yesterday. I completely forgot to bring home my 3D nail art to photograph, but it's coming, I swear! Yesterday was great because at this point I'm done with my procedures so I have a bit more freedom as to what I'm doing in a day. By "done with my procedures" I am referring to the fact that we have to complete a certain number of services while we are at school. Here's the list of everything I had to complete:

21 Manicures
20 Pedicures
20 Acrylics
16 Wraps
12 Tips
8 Gels
20 State board hands
10 Nail Art

I've completed everything except for 3 pedicures. Which means I'm not only on track, but I'm ahead. In order to complete everything you have to do at least 3 procedures a day, but I regularly do about 5-7.

Today I have my 200 hour practical exam, so I'll let you know how it goes this evening! Hopefully this cold doesn't bog me down too much!

0

cara menghias kue

Cara menghias kue- Cake decorating

Banyak moment bahagia seperti ulang tahun, hari lebaran, hari natal, paskah, imlek, kelahiran, dan perkawinan tidak lepas dengan kehadiran cake, tart atau puding lezat berhias butter cream. Menyajikan kue berhias cantik buatan sendiri tentu lebih membanggakan dan memberi arti khusus bagi penerimanya. Bukan impian, setelah mempelajari dvd tutorial ini Anda akan trampil menghias kue.

Sebagian orang menganggap bahwa dekorasi kue dengan butter cream sulit dipelajari. Anggapan ini tidak sepenuhnya benar. Menghias kue dengan butter cream tidaklah sulit. Asalkan rajin berlatih dan dilakukan dengan kesabaran, kue cantik bisa tercipta dari tangan Anda.

Melalui dvd ini, Anda akan dipandu bagaimana cara mengias kue dengan butter cream. Video step by step pembuatan hiasan semakin memudahkan Anda menghias kue.
Jika Anda jeli membaca peluang usaha boga, permintaan kue tart berhias sangat tinggi. Tidak menutup kemungkinan Anda menekuni usaha cake berhias butter cream. Berbekal dvd tutorial ini, Anda akan semakin trampil menghias kue.

Keterangan
Judul : Cake decorating
Harga : Rp 50.000.-

Wednesday, February 22, 2012

0

Another gelish French

Did this mani for a friend last night, shape is weird , but that s how she likes it.

0

Fafinettes

These are the ultra sexy, powerful Fafi girls/Fafinettes. They are the creation of artist Fafi who brought her work from the street to major companies like Adidas and M.A.C. The girls are characterized by their heart shaped blush.  

0

cara membungkus kado cantik

video tutorial membungkus kado cantik


Jarang ada orang yang menolak bila diberi kado, apalagi jika kado tersebut dikemas dengan cara yang istimewa. Seperti halnya saat kita menerima bingkisan. Walaupun isinya sederhana, namun jika dibungkus dengan indah akan terkesan istimewa. Membungkus kado yang unik dan menarik sama sekali tidak sulit.


Kado selalu melekat sebagai hadiah yang kita berikan pada peristiwa-peristiwa penting, seperti acara pernikahan dan ulang tahun. Kado bukanlah sekadar pemberian, tapi juga memiliki makna sehingga untuk membungkusnya tidak boleh asal-asalan.
Kini Anda dapat membungkus kado sendiri untuk berbagai acara istimewa, seperti ulang tahun, pernikahan, hari raya, dan valentine. Tentu saja bukan sembarang bungkus kado, tapi bungkus kado yang unik dan cantik.

Dvd tutorial ini mengajak Anda untuk berkreasi dalam membungkus kado. Cukup dengan melipat, menggunting, dan menempelkan aksesori maka Anda akan menghasilkan sebuah kado yang terbungkus cantik.

Keterangan
Judul : 55 cara kreatif membungkus kado
Isi     : 55 video tutorial
Bonus ebook
Harga : Rp 60.000.-

Tuesday, February 21, 2012

0

Nail School - Day 31

I skipped day 30, I know... I've been sick and pretty exhausted and most of the day I just slowly worked on my fake hand. Today I'm feeling a bit better so I'm back to blogging!

Today I did a Shellac mani on myself, which means that I have officially had acrylics, gels, wraps, and gel polish on my nails! That's pretty much everything, which is awesome! I wanted to try every product out so I knew how they felt and how they wore so that I could make sure I give my eventual clients the best results possible. Shellac is really easy, in fact I think it's easier than regular polish because it goes on so smoothly and if you need to clean up, it's super easy (it doesn't smear). The next investment I'll be making is a UV light so that I can do gels and gel polish when I start working. In a few days I'll be taking some pictures to show you the condition of my natural nails after all these procedures. Because I am gentle with my nails, they really aren't in horrible condition.

I also did something new for the first time today: 3D nail art with acrylics! It was tons of fun, which I wasn't expecting. I accidentally forgot to bring home the nails I worked on, so there won't be any pictures of them until tomorrow. But I promise it'll be worth the wait!

We also had our 200 hour written exam. I got a 95% and on Thursday I will be taking the 200 hour practical exam. Which is officially the last exam I have to take (until the actual state board)!

Sunday, February 19, 2012

0

Designer Logo Stamps - Nice or Tacky ?

Hello All
Recently got a stamping plate with designers logos, so was just wondering what my readers think of a nail design like this ? Do u like it or is it a fashion no no ? Would you wear nails with logos ?
And the base color for this many is gorgeous SOG shellac purple purple. Love this color!

Saturday, February 18, 2012

0

Nail School - Bonus Guest Post

Hi everyone! Today I have a follow-up guest post by Lexi from Finger Painted about what materials she received at nail school. Lexi is an incredible nail artist who just began nail school last week, and lucky for you, she's blogging about her progress! It's perfect timing to because soon I will no longer be in school so you can get your daily nail school fix from her! I forgot to mention the few things that the school gave me to keep (ie. they are my personal property and I get to take them with me when school is done), which include a brush for acrylics, a dappen dish, nippers, tip cutter, toenail clippers, scissors, tweezers. This is pretty much exactly the opposite of how Lexi's nail school does things, so without further ado, here's Lexi:


Hey! Its Lexi from Finger Painted :) I just started nail tech school and Ive blogging everyday as well. Nev asked me if I would talk about what the school provides and what I have to buy.  My school is sponsored by OPI so all the products we use are OPI. Just like at Nev's school, we have a closet in the classroom that has supplies and a polish rack, but we also each have our own nail kits. Part of our tuition goes towards the kit that we receive on our first day. The kit is absolutely tremendous and weighs a million pounds! haha. Most of the stuff we need in class is in our kits so we have to bring them back and forth with us everyday. I took tons of pictures of everything inside. The only thing we had to buy separately from the kit was a tip/edge cutter for tips and a straight edge toenail clipper. We also don't have fake hands to use at school so I bought my own.

Friday, February 17, 2012

0

Nail School - Day 29

Two weeks left! Crazy stuff! Today I did a pedicure and some work on my fake hand. Then I put more gels on myself. This time I used forms to extend the tip. I'll let you how they last because you may recall that I've had some trouble with them popping right off in the past! Here are some photos:

Yay gels!

This is my right thumb, I did a very thin application on this thumb because this is the thumb I use for EVERYTHING. I usually don't put nail art, nail polish, or anything else on this thumb. 
Anyways, yesterday I promised a discussion on where I get the products that I use while I'm in school. Susie, my soon to be mother-in-law asked about this. And I'm under the impression that it's vastly different at different schools, so this is my school's policy. We have a big gigantic closet and a room that contain all the products we use while we are at school. This means that everything from acrylics, to forms, to lotions, to polishes (we use Zoya), to sea salt is provided to us. I think this is foolish for a lot of reasons, but here is the main one: This means that students regularly take WAY too much product because they don't get penalized if they do. There is a lot of waste in this school. However, I must say that I like our system because I don't feel pressure to be perfect when I'm first learning something, which is how I would feel if I were wasting my own products. Today I bought a BUNCH of products for at home use (I spent $100, eep!), but I'll be using them sparingly while I'm at school. Hopefully they'll pay for themselves! 

0

Another Set of Hearts

Hearts and flowers for a belated Valentine's day look. I think the flowers didn't turn out so hot, but the interlocking hearts turned out pretty cute!