Showing posts with label flowers. Show all posts

Tuesday, June 12, 2012

0

Sponged Flowers


This week, I thought I'd try something a little different with the sponged designs. Since I didn't have time to edit video last week, I figured I'd just do another static tutorial this week. It was fun, though it did take quite awhile for this particular manicure...


I had a French manicure in mind, with delicate flowers just sort of hanging in the design. As usual, it turned out much differently on my nails then in my head, but I don't think it was too bad for a first try. The colors I used are OPI's "My Daddy's the King" and "Bubble Bath" (though I couldn't get BB open, so I substituted Finger Paint's "Well-Cultured Pearl" for the white), China Glaze "Wine Me, Dine Me" and another OPI, "Here Today, Aragon Tomorrow".

To start, I layered two coats of "MDTK" over a coat of Seche Vite base coat:


I couldn't get my BB open, so two coats of "Well-Cultured Pearl" at the tips, and then one more thin coat of MDTK over the whole nail, to mute the white and blend.


Then I used Here "Today, Aragon Tomorrow" applied with a fine paintbrush to create stems and leaves for my flowers:


And then a small piece of natural sponge dipped into "Wine Me, Dine Me" to apply the flowers.


Two coats of Seche Vite top coat to seal, a little clean-up, and voila! Puffy flowers!

Next time, I'll cut the sponge smaller - the larger sponge tip made it hard to maintain control, but I think a smaller tip will do the job fine. I'll also use a nail art pen or striper brush for the stems...the regular paintbrush just didn't quite give me the control I would have liked.

Nonetheless, I've gotten several compliments on this one this week, so it's definitely getting noticed. :-)

I just got a package of goodies from Glamorous Cosmetics, so next week, a manicure featuring those! Until then, happy polishing...

Thursday, March 1, 2012

0

Nail School - Day 38

Tomorrow is my last day. At 1pm tomorrow I will be done with nail school forever. But that won't be the end of my adventure. As soon as I'm done with my school day, I will begin the quest to pass my state licensure exams. This adventure will begin at the doctor's office. By 2pm tomorrow I plan to be at the doctor's to get a form signed that certifies that I'm infectious-disease-free. Luckily, I'm pretty confident that I am, so getting this paper signed won't be a big deal. After the paper is signed, I have 30 days to get my temporary license. The difference between a temporary license and a regular one is that "temporary" signifies that I haven't passed my state exams yet. However as soon as the temporary license is in my hand, I can start working. To get my temporary license I have two options. I could either do it by mail (which could take weeks) or I can drive to Syracuse (approximately 1.5 hours away) and get it in person. The office in Syracuse is only open on Monday's, so bright and early Monday morning I'll be making that journey. I have high hopes to start working on Tuesday, but again, we'll get to that when we get to it =)

I am so happy that everyone has followed me along for this journey and I'd just like to say that without the support of this blog, and without having my own little corner of the internet to vent to, I'm not sure if I could have done it!

Since I started school I haven't just been changing my nail art, I've been changing my nails constantly too! So here's what's on my nails today! I did a fill on the gel nail extensions I had on and added some 3D roses. What do you think?


Friday, February 17, 2012

0

Another Set of Hearts

Hearts and flowers for a belated Valentine's day look. I think the flowers didn't turn out so hot, but the interlocking hearts turned out pretty cute!

Thursday, February 16, 2012

0

Genesee Bock Beer

Man, I sure was a sour puss yesterday. On the plus side my grumpy mood has made motivated me to have some awesome stuff for you tonight! There will be a photo of me in my uniform, some explanations of the licensure process in NY and best of all a VIDEO TUTORIAL on the Chevron nails I posted yesterday (I already took the video so now I just have a little bit of editing to do! 
Here in sunny Rochester, NY (I'm being facetious, Rochester is pretty much never sunny) our local beer is Genesee. It's pretty awful and the joke is that the disgusting Genesee River water is the main factor to its grossness. It is widely accepted that there is only one type of good Genesee beer: Genny Cream Ale. I will admit, the Cream Ale isn't that bad. I still don't understand why people choose to drink it. More recently, Cream Ale's status as bearable has been compromised because of the rising popularity of Genny Bock. A bock beer is a spring-time beer that is usually a pretty strong lager. Ron (the fiancee) enjoys a good Genny Bock now and again (I'm not much of a beer drinker, you're more likely to see me sipping a glass of bourbon), which he claims to like because of the flavor but I'm convinced he likes bock's because of the official spokes-animal, the billy goat (Ron adores goats). But either way, he was having a beer with dinner the other night and I realized how perfectly the can could be turned into nail art! Even the green background with flower details was beautiful! 

Friday, December 30, 2011

0

Lotus

When I started painting these, I was trying to mirror my engagement ring which has a long oval in the middle and two side-ways ovals framing it. The design turned out looking more like abstract lotus flowers to me, which is awesome! This was one of those really simple designs that I ended up loving! Plus it was super simple to do. I have a feeling I'll be doing this design again!

Friday, December 16, 2011

0

Mod-ish Flowers

One way that I come up with new nail designs is by flipping through fabric patterns and this is a design that was inspired by a pattern that I saw. I didn't take a picture of the pattern, but I do remember that it was lime green and white. I decided to mess around with some possible wedding colors so I used a very light lavender (it looks more grey in these photographs), chartreuse, and black.

I loved how these nails turned out! But they didn't get much of a response on tumblr. What do you think?  I'm starting to think that my bad photography skills are affecting how awesome my nail art looks. 

Monday, July 25, 2011

0

More Flowers

The height of my flower phase! The flowers above are brown, light blue, and pink over a maroon background. And below were blue flowers that faded into a yellow center. I wore the above flowers on my left hand and the below flowers on my right hand. I really disliked both of these designs, so I don't think that they lasted very long!

Also, I'm sorry about the HORRIBLE picture quality for these pictures... The picture quality gets better and better as the posts go on, and these are definitely the worst quality pictures I have.

0

Abstract Flowers

I went through a flower phase, but since I'm not particularly girly, all the flowers are kind of abstract. These were some what inspired by Kawaii's Cath Kidston nails. I thought it would be interesting to see if I could make what Kawaii (and Kidston) use as a background into a flower itself. I wasn't very happy with these, but looking back on them, I feel like I might be able to use this design to inspire me further.

Wednesday, July 20, 2011

0

Roses

This was a first attempt at roses (expect for the single rose I did for an early Valentine's Day). They ended up looking more like dots than roses, but I learned a lot about the spacial aspects of nail art while doing them.

0

Mod Flowers

This is another design that I repeat a lot now-a-days. I like it because it's simple and looks great with any colors. This color combination and design came from The Daily Nail.

Tuesday, April 27, 2010

0

Clay Flowers


My apologies for the tip pull & cuticle line chips on the "finished" photos this week. I forgot to take these until the manicure was five days old. My bad!

I decided it was time to break out the clay canes again, though I'm not very good at slicing them thin. Here's what the end of this cane looked like before I started slicing it:
After slicing, lots of little flowers...
Then I started with two coats of Essie's "Angora Cardi".
Then I placed the clay circles. I was going to use two on each nail, but considering how thick I sliced them, I decided just one would be better.

Then I used Essie's "Secret Affair" and a toothpick to make dot trails from the flowers (I may have mentioned I'm in a "dots" mood?).
And that's it - two coats of top coat to seal, and clean up afterward. If I could have gotten the slices just a bit thinner...
 
Obviously, I need to practice more with the clay...think I may order pre-sliced next time. They're still kind of fun though, and I actually liked the 3-D effect on my nails.

My apologies for not picking up my awards last week - things were kind of crazy around here. I'll do it this week, promise...

Next week, I feel cloudy skies coming on...until then, happy polishing!

Tuesday, November 10, 2009

0

Pink Petals

I was trying to choose (quite literally) between light and dark nails this week. So I let hubby choose, and this pretty "Golden Rose" color from Avon was the winner. Another polish from their fall collection, you can sort of see from the photos that it has gold mica in it to give it that "golden" shimmer. Very pretty polish. I've been wanting to play with these little gold metal petals too, so even though it's not very fall-like, I've got a flowery manicure going on this week.

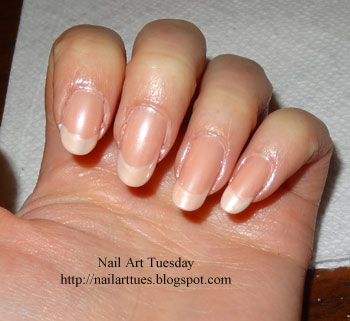
It's occurred to me that I don't actually show my nails "in the buff" much (because really, if you've seen them once, you've seen them). So I thought I'd post a photo of my naked nails today, so you can see what they look like just before I start polishing them up again. To get to this point, I removed last week's polish, washed & scrubbed, trimmed my pinky nails (they were hitting wrong keys when I typed), filed the edges and buffed the tops (file and buffing done with a crystal nail file). And voila, boring nails roughed up and ready for base coat.
I used Avon's base/top coat, but really need to order some better quality of each. I've been a bit lazy with the ordering lately. One coat of base, then two coats of "Golden Rose".
Avon has a thing for quick drying polish. They have a whole line, actually, but this pro stuff dries nearly as fast. Good for doing a rush polish job, not so good for nail art, especially with these little petal things. I really had a hard time getting these set quickly enough to stick into the top coat.

I started by laying out some petals in a basic flower shape.
Then I added a few extras on the side of the flower for little embellished stems. Would have been much easier with a different brand of top coat - I'd recommend China Glaze, Zoya or OPI. Something that doesn't dry too quickly.
I repeated it on all my nails, then sealed with two coats of top coat over the tops.
Clean 'em up, and voila! Pink and petally. You'll notice my index finger and thumb on my left had are a little goopy in the polish...I had to fix mistakes with layers because the tool I use to pick up stones, etc kept slipping off the petals. Frustrating.
And a shot outside in natural light.
I think I'll be going back to fall browns next week. Until then, happy polishing!

Tuesday, September 1, 2009

0

Porcelain Flowers

I'm switching up the post format this week - posting more of a step-by-step tutorial on how I got the nail art look I'm wearing this week. Let me know if it's helpful, or if there's another format you'd like to see, feel free to speak up.

This week's design is inspired by some porcelain rose decals I found at Sally Beauty Supply last weekend. They're 3D roses, and just gorgeous! I picked China Glaze "Cherish" and Zoya "Felicity for the polish colors, and got some gold boullion beads to compliment the little gold beads on the decals.

I started off with 2 coats of Felicity. I should warn you now - I am not a "neat" nail artist...I make a huge mess, and worry about cleaning it up later. Much less stressful for me than trying to focus on working clean throughout. So the photos in this post are true to my working style - messy.

Then I swiped over the bottom corner with Cherish to start creating a "V" at the base of my nail, going the other way to complete it. I don't worry about whether my initial lines are smooth - that's what beads and nail art pens are for.


Then I placed the flower decals in the center of each point. The decals are self-adhesive, but I put them on before the polish is too dry, which helps them adhere strongly. I wear my nail art for 6 days at a time, so I need it to be very strong. After I put the decals on, I went over the whole thing with top coat, paying special attention to the base of the decal.
You'll notice that the decals have little gold balls for accents. I simply extended that with the gold bouillon beads, covering the edges of the green, and then creating little gold "ribbons" hanging from the flowers.

This was my first time working with the bouillon beads. It definitely takes some practice. If the nail is too wet, they'll slip around. If it's too dry, they won't stick. I generally swipe a strip of top coat over a small area, put the beads on, then move to the next area. It's time consuming, but worth it, I think.

After I put the beads on each nail, I used 2 more coats of top coat over the whole design on each nail. Four coats of top coat in all to affix and seal the nail art for a week's worth of wear.

I let them dry overnight, and cleaned up the next morning in a sink of warm, soapy water with an orange stick. And voila - some pretty fancy nail art that reminds me of weddings (or anniversaries - mine is at the end of the week).

So far, they've been wearing well - I did this manicure Saturday night, and all the decals and beads are still very solid. I love the roses, and I'm going to try to get them off the decal backing so I can use them again later. Yes, they do get in the way, and I wore gloves to do some kitchen chores yesterday so they'd be protected. Not something I'd want to wear in sweater weather, but fun for now. I think next time, I'll just do three nails each hand with the flowers.

Pedicure photos on Thursday - until then, Happy Polishing!